
Thanks, that’s what I figured, but I saw some with different percentages. So I figured I better make sureBeing a simple chemical compound, there shouldn't be much variance between brands.?
Show Us Your DIY Restorations!
- Thread starter T-townrestore
- Start date
You are using an out of date browser. It may not display this or other websites correctly.
You should upgrade or use an alternative browser.
You should upgrade or use an alternative browser.

SmokingPipes.com Updates
Watch for Updates Twice a Week
PipesMagazine Approved Sponsor

PipesMagazine Approved Sponsor

PipesMagazine Approved Sponsor
PipesMagazine Approved Sponsor


Ehrlich cleaned up nice, I thought.

Well done, sir ! Great job on the restoration, you're an expert .Here’s how my three Christmas pipes from my dad turned out. I guess I’ll try the meerschaum lined kaywoodie, I’ve never tried meerschaum.View attachment 138083View attachment 138080View attachment 138081View attachment 138082
Would you mind sharing the process ? How did you clean up the rims ?
I'm no restorer so I avoid acquiring pipes that may need to end up in the hands of an expert before I can smoke them.
I was browsing an online selling site here (it lists everything fom old junk to new cars) when I spotted this dirty looking pipe. The pictures were poor and the only information it had was ''England''. As it gave me a good feeling, especially the shape, and it was very cheap I bought it.
Not only did it turn out to be a Sasieni it was in pretty good condition considering its age. As it was mostly just covered in grime a good wipe with a damp cloth was all that was needed then an application of walnut oil to bring the grain back to life.
Before.
After.
1st gonna ping @ssjones to post his lovely recent GBD project!
2nd here's my S Bang rescue from an antique shop, got it with a pipe stand and a few other decent pipes for about $200; both the shop owner and myself thought we made out like bandits...
I don't have a 'before' before picture as I was excited to get to work on the pipe, but it had a pretty scorched rim and a crusty stem - here's a pic after I've stripped the original stain, fixed up the rim without taking too much off, and spent a lifetime micropadding the oxidation from the stem:

And here she is after I made my best attempt at mimicking the Castello Aristocratica stain; but given the S Bang's Danish heritage, I decided to go with a more rose brown. The results came out a little more red than I had anticipated but I was still happy with the project overall.
S. Bang 'self-resto" Aristocratica Rossa:

2nd here's my S Bang rescue from an antique shop, got it with a pipe stand and a few other decent pipes for about $200; both the shop owner and myself thought we made out like bandits...
I don't have a 'before' before picture as I was excited to get to work on the pipe, but it had a pretty scorched rim and a crusty stem - here's a pic after I've stripped the original stain, fixed up the rim without taking too much off, and spent a lifetime micropadding the oxidation from the stem:
And here she is after I made my best attempt at mimicking the Castello Aristocratica stain; but given the S Bang's Danish heritage, I decided to go with a more rose brown. The results came out a little more red than I had anticipated but I was still happy with the project overall.
S. Bang 'self-resto" Aristocratica Rossa:
This one is particularly interesting, but it looks meerschaum lined, whereas none of the before photos indicate that.

This one is the top pipe in the picture. It had quite a bit of build up on the meerschaum.This one is particularly interesting, but it looks meerschaum lined, whereas none of the before photos indicate that.
Here is a zoomed in look the rim.

Holy Cow! Thank you! What a fine job on spiffing up the meerschaum lining.....
I am sure a number of us would like to know what steps you took to get there.
I am sure a number of us would like to know what steps you took to get there.
I used dental tools to chip away the build up and sanded it with rough to fine sand paper around my finger. The inside of the lower bowl is still darker, but is cleaned up.Holy Cow! Thank you! What a fine job on spiffing up the meerschaum lining.....
I am sure a number of us would like to know what steps you took to get there.
Thank you for sharing.
Did you finish the rim with sandpaper wrapped around your finger ,
like we sand out the bowl with sandpaper wrapped around a dowel ?
That is unorthodox
Did you finish the rim with sandpaper wrapped around your finger ,
like we sand out the bowl with sandpaper wrapped around a dowel ?
That is unorthodox
With the lava buildup I recently discovered that a damp Mr. Clean magic eraser worked great. As for the charing and out of round rim I top just a little bit of the bowl, and bevel the inner rim a little to make it round.Well done, sir ! Great job on the restoration, you're an expert .
Would you mind sharing the process ? How did you clean up the rims ?
Yeah I did. This is my first meer pipe I’ve worked on. Let me know if the way I did it was wrong, or damaging to the liner. I’m always learningThank you for sharing.
Did you finish the rim with sandpaper wrapped around your finger ,
like we sand out the bowl with sandpaper wrapped around a dowel ?
That is unorthodox
On a topping board?With the lava buildup I recently discovered that a damp Mr. Clean magic eraser worked great. As for the charing and out of round rim I top just a little bit of the bowl, and bevel the inner rim a little to make it round.
I don’t have a dedicated board. I just use sandpaper at what ever work bench I’m at making sure it’s even removal. Use the rough grit to take off most of the amount you are topping. Then work up through the finer sandpaper.On a topping board?
I learned the hard way with the first pipe I topped, if it’s a bent pipe have the shank hang over the edge. I was lucky it was just a cracked Grabow I used to learn the techniques.
Anything ever happen with this pipe?Here’s my latest before, hoping there’ll be an after. Had quite the burn out. My dad says it looks like art and hang it in a shadow box. Lol, newly discovered Picasso pipe.
Lol, no not beyond cutting a piece for the hole. It kind of intimidates me so I avoid itAnything ever happen with this pipe?
Fair! I hope to see if if you ever do take action.Lol, no not beyond cutting a piece for the hole. It kind of intimidates me so I avoid it
With everyone I’ve gotten advice from makes it sound so simple.Fair! I hope to see if if you ever do take action.
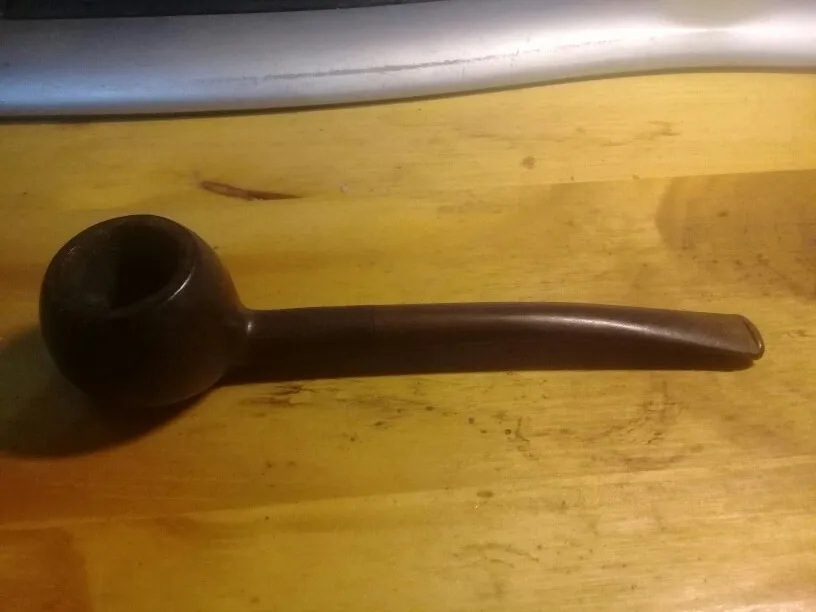
I found this old beat up pipe at a yard sale for .50 cents!!
I just couldn't believe it, I knew it would clean up real nice. It took a LOT more work than I expected, but I'm pleased with the results..........
BEFORE:

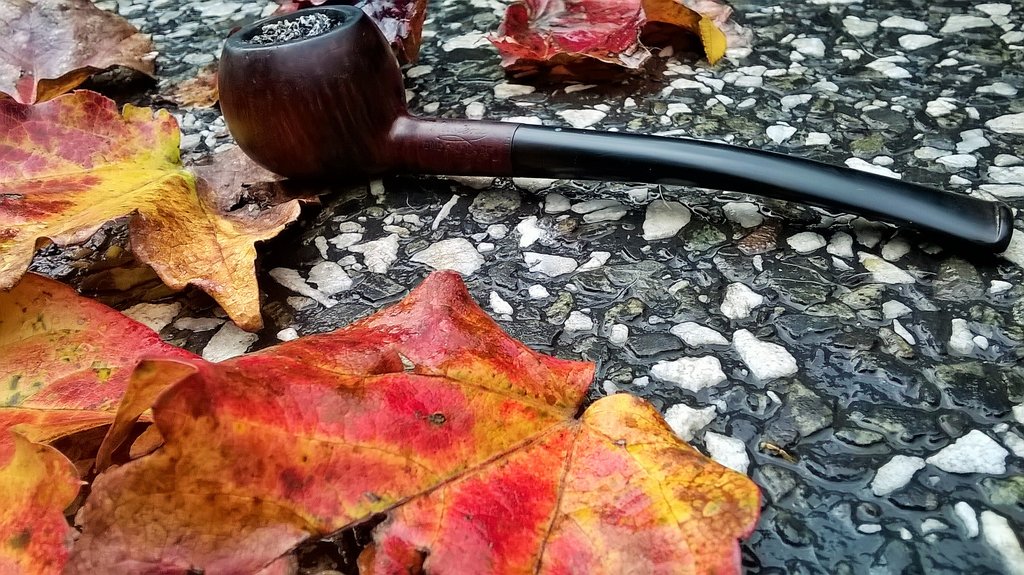
After many hours of cleaning, finally!! The AFTER pic!!

I'm enjoying the restorations so far, looking forward to finding another soon......
I just couldn't believe it, I knew it would clean up real nice. It took a LOT more work than I expected, but I'm pleased with the results..........
BEFORE:
After many hours of cleaning, finally!! The AFTER pic!!
I'm enjoying the restorations so far, looking forward to finding another soon......